hexo 加入 mermaid(基于butterfly主题)
Hexo中插入mermaid diagrams(基于butterfly主题)
Excerpt
以下是使用中的hexo插入mermaid diagrams的方法。
感谢做插件的人!感谢Hexo中插入mermaid diagrams | Yu’s Notes (wangxiaoyu-go.github.io)文章作者
github参考link
Mermaid diagrams介绍gitbook Mermaid | Diagramming and charting tool
安装插件
1 | npm install hexo-filter-mermaid-diagrams |
npm install hexo-filter-mermaid-diagrams 修改配置文件在hexo的_config.yml文件(根目录的并非主题的)中,添加以下内容:
修改配置文件
在hexo的_config.yml文件(根目录的并非主题的)中,添加以下内容:
1 | # mermaid chart |
js文件修改
- 修改位置 (butterfly主题为例)
themes\butterfly\layout\includes\footer.pug - 根据footer的格式不同,添加的内容不同。
格式有after_footer.pug,after-footer.ejs,footer.swig等。
以下是在includes的footer.pug添加的内容。其他格式参考github: hexo-filter-mermaid-diagrams
1 | if theme.mermaid.enable == true |
到此为止,设置的部分就结束了。
语法
语法要稍微注意一下。
有一些markdown的编辑工具,比如 Cmd Markdown,mermaid的语法是这样的:
1 | Alice->John: Hello John, how are you? |
注意,这款插件语法略有不同:
- 三个点后面要写的是mermaid,而不是sequence,graph TD等mermaid diagram具体类型。
- 在内容的第一行写sequence,graph TD等mermaid diagram具体类型。
pie
    title Key elements in Product X
    "Calcium" : 42.96
    "Potassium" : 50.05
    "Magnesium" : 10.01
    "Iron" :  5
效果
至此已经完成了mermaid设定,在环境中也可以正常使用了。
此时效果截图: 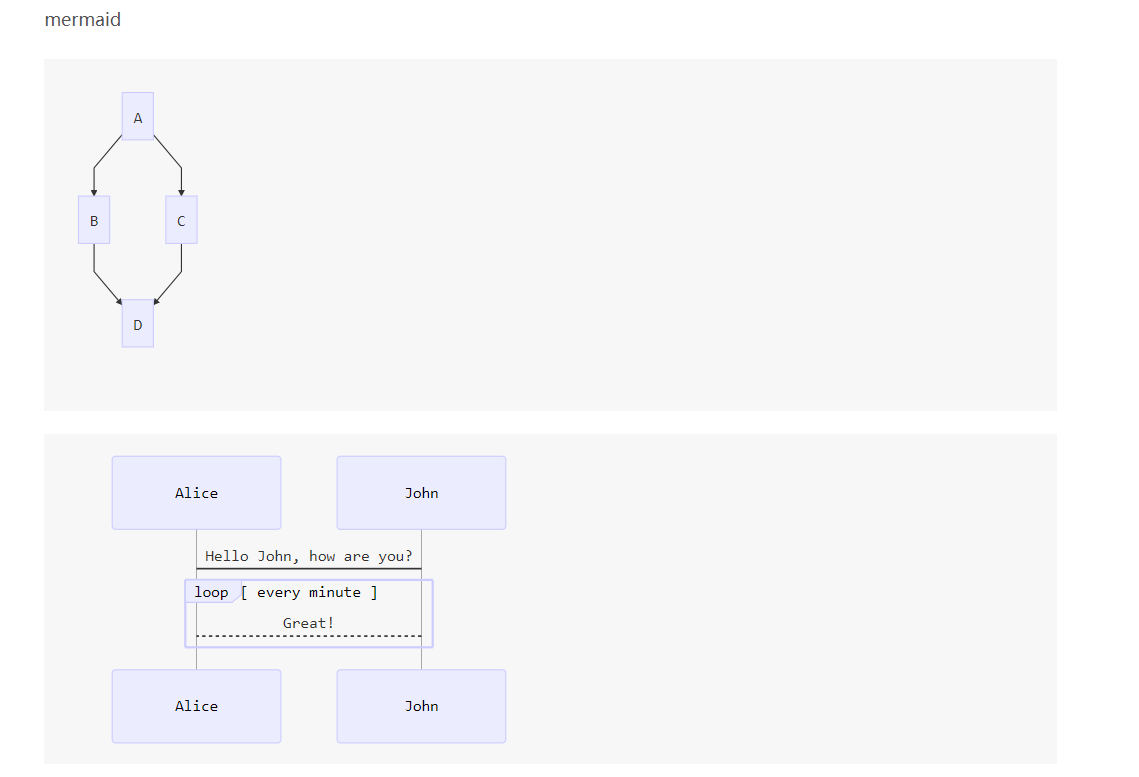
不需要更换背景颜色的话,执行hexo g,hexo d就完成了。
可以看出效果背景是灰色的。
像我一样想换一个背景颜色的话,继续下一小节。
个性化背景颜色
个人希望没有背景颜色,是透明的。
hexo有供用户设置的css文件。需要在这里添加需要的css内容。
- 文件位置(butterfly主题为例)
themes\butterfly\source\css\_custom\custom.css - 添加内容
1 | /*mermaid*/ |
效果
甘特图_gantt diagram_
gantt
    section Section
    Completed :done,    des1, 2014-01-06,2014-01-08
    Active        :active,  des2, 2014-01-07, 3d
    Parallel 1   :         des3, after des1, 1d
    Parallel 2   :         des4, after des1, 1d
    Parallel 3   :         des5, after des3, 1d
    Parallel 4   :         des6, after des4, 1d
更换css时,部署前有时需要先clean一下(不知道是不是bug)。
所以执行hexo clean,hexo g,hexo d完成部署。
注意:
每个markdown页面的最后一个mermaid图的后面需要加上{% mermaid %}`,`{% endmermaid %}才可以让mermaid图在butterfly主题上完美显示。markdown只显示{% endmermaid %}前的mermaid图。
例: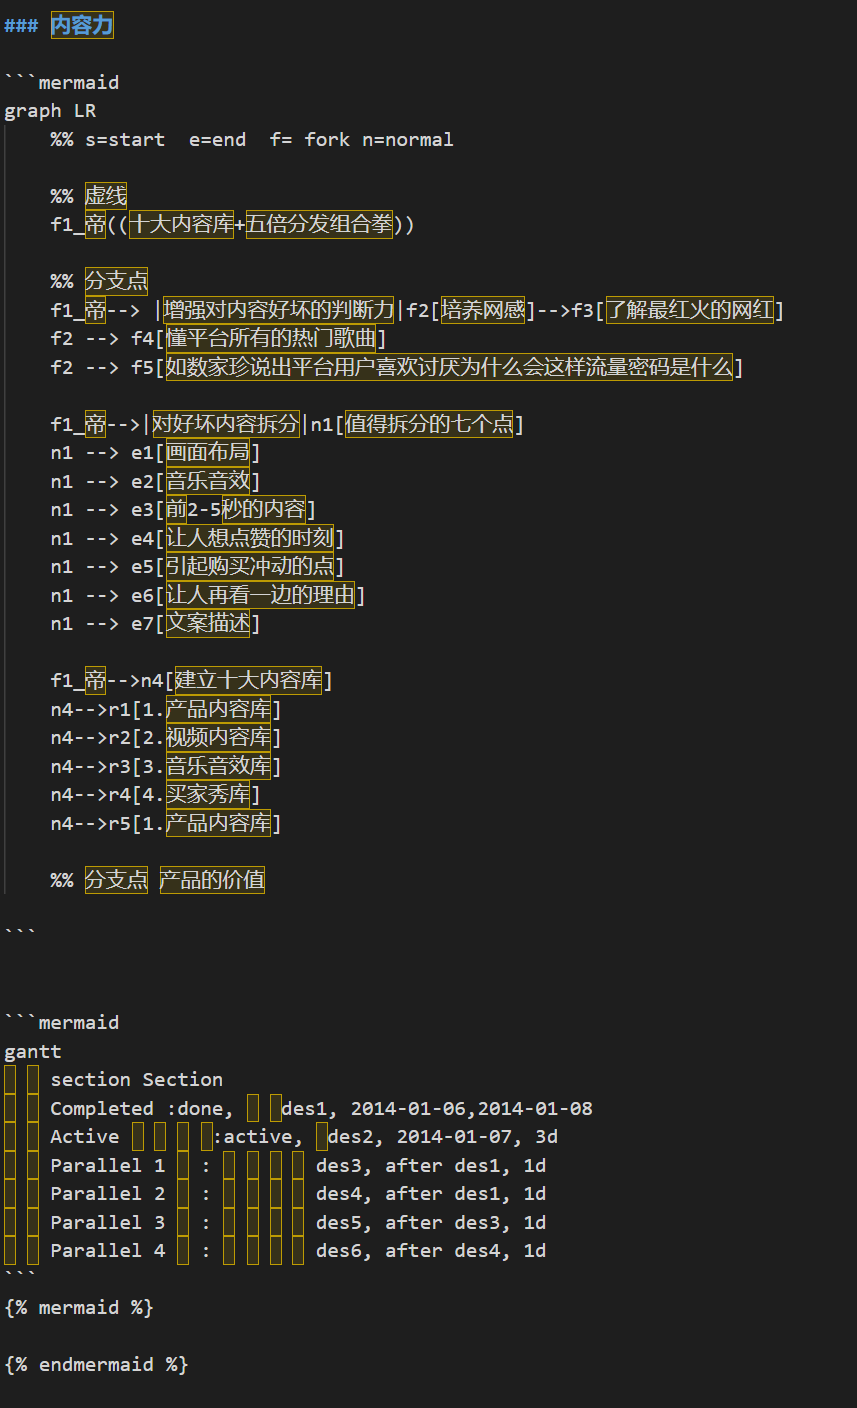
2.❗️❗️❗️Notice: if you want to use ‘Class diagram’, please edit your ‘_config.yml’ file, set external_link: false. - hexo bug.
一定要在hexo的配置文件中将external_link改为false,这是hexo的一个小bug
 微信(wechat)
 支付宝(alipay)